I Have My Own Clothing Line?

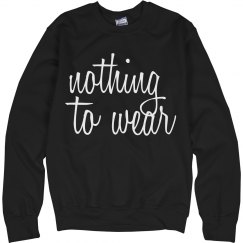
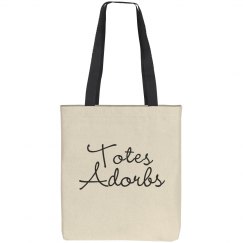
I've been pretty busy lately and I apologize.  With that being said, some exciting things have happened in my life and I want to share them with you. To start, I have a niece! Baby Charlotte Grace was born last week and may or may not be why I didn't post a new blog... she's beautiful (No excuse girl! I know... Sorry!). Onto other news, I'm sure you've read the title by now, I have my own clothing line! I've always wanted to design and make clothes but never really found my niche. However, with the help of Customized Girl I've been able to create and even sell my own designs. I have everything from sweatshirts and t-shirts to bags and towels, all ranging in prices. Please go to my website, check it out and share with family and friends! I'm really excited for this opportunity and I hope you are too! If you have anything in specific you want made, send me an email or send me a pic!


A few of my creations:


St Patrick's Day Outfit Ideas


Simple on St. Patrick's Day

 T-Shirt: Old Navy $.99
Jeans: Thrift Shop $5.00
Sandals: Thrift Shop $1.00
Total: $7.00


Stylin' on St. Patrick's Day

 Sweater: Goodwill $3.99
Skirt: Wet Seal $4.00
Shoes: Online $3.00
Total: $11.00


Spring on St. Patrick's Day

 Shirt: Goodwill $3.99
Jeans: Gordmans $12.99
Sandals: Rue 21 $3.00
Total: $20.00


No Heat, Overnight Curls!


Start with damp hair, 80% dry.
Divide hair into sections. (To determine how many sections you will need depends on your hair thickness; I have thick hair and used four sections.)


* It's important to remember that the smaller the sections, or buns you have, the curlier your hair will be.


Once you have your hair parted use a headband/sock to hold hair in place. Knot it. (Make sure you place your pony high on head; this will make it easier to sleep).


When pony is secure start wrapping hair away from you face and around the headband/sock.  Continue until all hair in section is wrapped around material. 


Finally, start wrapping hair around itself to create a bun. Secure bun in place. 
Continue this process until all hair is placed in buns.


Go to bed. 

Right after buns are taken out!
When taking the buns out be gentle! It'll probably look at little crazy at first (see above picture) but use moose and fingers to comb through to calm the crazy!

Moosed to my perfection.
And you're done! Soft, natural looking curls that last for days (3 to be exact!)!


DIY: Spring Restoration


 What You'll Need:
A Purse
Mod Podge
Paint Brush
Scissors
Fabric


Cut fabric into shape/design. Use the Mod Podge as glue and paste object onto purse. Add thick layer of Mod Podge over top of fabric as well. Continue cut and paste method, adding a thick layer of Mod Podge until your design is complete. Allow 30-45 minutes for glue to dry.


All Finished!

DIY: Sweatpants To Skirt


Do you ever have one of those days where pants just aren't going to work? How about those days when sweatpants are the only thing you can wear? If this is ever you, I have the perfect solution to your problem. 
The following DIY will explain how to turn your favorite pair of sweats (or any pair, because, you know, can't even think about cutting up those perfect pants) into a comfy but stylish skirt for those days when getting dressed is out of the question.

What You'll Need:
(1) pair of sweats
scissors
needle and thread or fabric glue 


 Begin by cutting sweats to the length you want your skirt to be, adding a an 1/2 inch for seam allowance. Next, cut inseams (the crotch seams).

 Turn inside out and flatten (once flattened the crotch seams should now be located on the right and left side [they are outside of the dotted lines in picture] and the original right and left leg should now be the front and back of the new garment). Use the dotted lines as guide to sew/glue to create new seams for skirt. Hem bottom. Turn right side out. 

Done!

3 Easy and Cheap DIYs for Valentine's Day

 "We make the perfect match!"

What You'll Need:
Pair of Socks ($1.00, Dollar Tree)
Red Felt ($1.00, Dollar Tree)
Fabric Glue ($1.00, Dollar Tree)
Total Cost: $3.00


 Using red felt, cut two hearts. Find calf area on sock and glue hearts in place
Fold and tie with ribbon. 


"I gLOVE you so much!"

 What You'll Need:
Pair of Gloves ($1.00, Dollar Tree)
Pink Felt ($1.00, Dollar Tree)
Fabric Glue ($1.00, Dollar Tree)
 Total Cost: $3.00

 Put gloves pinky sides together. Using heart cutout, make straight cut down middle of heart to create two halves. Glue in place.


"Just HAT to say, you're my valentine!"

What You'll Need:
Beanie ($1.00, Dollar Tree)
Black Felt ($1.00, Dollar Tree)
Black Yarn ($3.99, Walmart)
Total Cost: $6.00


 Wrap yarn around pointer and middle finger 50(+) times [this will determine how big pom pom is; if you want big pom wrap more and vice versa]. Slide off finger and tie a loose piece of yarn around entire pom. Cut loops to get finished look. Glue at crown of beanie. Finally, add black felt heart. 


Valentine's Day Outfits

With Valentine's Day right around the corner having the perfect outfit for any occasion is a must. I came up with three different looks that are comfy, casual and of course, cute (the essentials for Valentine's Day, right?!). So whether you're cuddling up with your crush or having a girls night out, February 14th will be a day full of fashion.


Outfit #1. For this look I wanted something simple with a little sass! I began with a basic white long sleeve (Old Navy, $4.00) and a pair of LEI jeans (Goodwill, $5.00). For the sassy part, I added a pop of red (scarf, Dollar Tree $1.00) and tan booties (Gift). This outfit is great because all items can be found in your closet and dressed up to your desire.


 Outfit #2. This outfit is for all you girls that want to be super casual. I started with striped shirt (Charity Shop, $1.00) and dark wash jeans (Unknown). To finish up this look, I paired my red converse (Goodwill, $3.99) and a red beanie (Dollar Tree, $1.00). I like that this outfit can be worn anywhere and you still look put together and cute!


Outfit #3. I've been really into quilted vests recently so of course I created an outfit that include one! So to start off with a red vest (Charity Shop, $1.00). I added a chambray button up (Charity Shop, $1.00) underneath and paired that with black jeggings (Walmart, $4.00). To pull the look together I threw some red flats (Goodwill, $3.99) in the mix. I love how preppy this outfit it, by far my favorite! It keeps you warm and comfy but still looks chic!